
Losing Control and Liking It: Creating Art with Alcohol Inks
- Pam Hayes

- Jul 23, 2021
- 5 min read
Before I begin my description of working with alcohol inks, it might help to know a bit of my history with art. My approach to creating art comes from my years of experience as an art teacher. Drawing and painting were my favorite subjects to teach and I felt that I should be able to give my students instructions and examples with a wide variety of media. So, I worked with acrylics, watercolor, pastels, oil pastels, inks, pencils, and charcoal. I felt that I was fairly competent handling a lot of different media and I simply could not choose one over the other. I liked them all. After I retired, I continued to do a bit of artwork at home and took some classes in oil pastel, watercolor and oils just to have fun being creative and becoming acquainted with new skills and techniques. Then, my artistic vision had a dramatic jumpstart with the addition of alcohol inks to my line up. A friend of mine, also a retired art teacher, introduced me to alcohol inks through her workshop. I was so excited with the possibilities that the inks offered, that I continued to work with this medium, acquiring more and more supplies and skills along the way. Hopefully, the information in this blog will help you decide to become an “alcohol ink addict” like me!

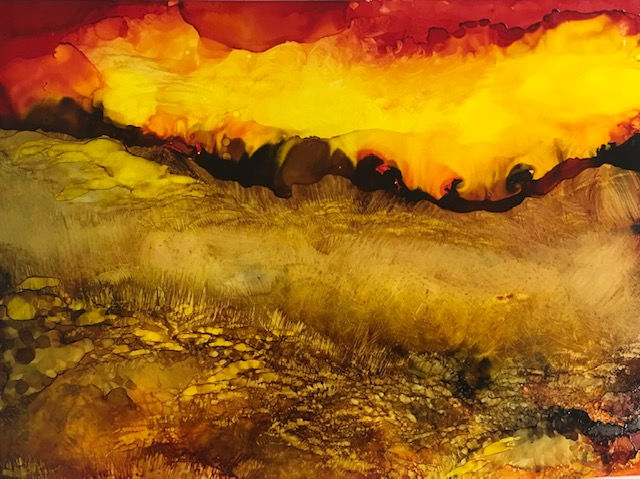
So, what are alcohol inks? According to Plaza Art Blog, “Alcohol inks are fast-drying, highly pigmented, alcohol-based inks that are great to use on any hard, non-porous surface including glass, metal, plastic, ceramic, stone, leather and polymer clay. Once the ink is applied, the alcohol evaporates, leaving the dye behind. Once alcohol ink dries, it can be re- wet with rubbing alcohol (91% Isopropyl Alcohol), allowing for unique and versatile effects that cannot be achieved with water-based products like acrylic paint.” In my opinion, there is something about the way that alcohol inks move and blend that is very attractive to artists like myself who enjoy creating art with spontaneity and uncertainty. It is simply a very fun process to experience. I became fascinated by the intense colors and the unpredictability of the inks during application. You simply could not control what might happen each time. The colors could blend in different ways; and colors could be lifted, erased, and reapplied to create unique effects. Using a variety of brushes and other implements to apply the inks would create textural elements that were unusual and even surprising. Being primarily a landscape artist, I found that alcohol ink techniques worked extremely well with those elements. When I create landscapes, I like to use my imagination rather than photographic images. Not knowing what might happen, or losing control, is helpful in achieving a freer or more impressionist style in my work. Alcohol Inks are a very entertaining and versatile medium.

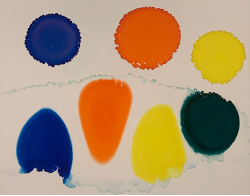
Now that I have worked with alcohol inks and have taught workshops as well for a few years, I feel comfortable sharing some information about this medium and the techniques involved. First, there are some basic supplies that are needed to begin work with alcohol ink. Alcohol Inks come in small bottles, sold in sets or individual colors and are also available in markers. Substrates on which to apply the ink include Yupo paper, photo paper, ceramic tiles, gessoed board, metal, glossy metallic papers or anything that is impervious to water. To apply the ink or create textures, brushes of different sizes and types are useful. A fan brush is especially effective. Rubbing alcohol (91%) is used to lift, clean, blend or erase the inks. Blending solution, which is alcohol plus glycerin, helps the inks dry more slowly and blend easier. A small plastic or ceramic palette is necessary to hold inks when using a brush or mixing colors. Inks can be moved by blowing across the surface with compressed air or a straw. A very important item for using alcohol inks is rubber gloves because the ink can be toxic if it remains on your skin. Other items to have in creating work include paper towels for altering the inked surface and a spray bottle filled with rubbing alcohol to create special effects. Details can be added on top of dry ink with Sharpies or gel pens. To properly finish an alcohol ink piece, you will need to spray it with Kamar Varnish first, then Krylon’s UV spray can help keep the inks from fading. It is advisable to display paper pieces matted under UV glass. Unfortunately, alcohol inks are not totally lightfast, so these precautions are necessary. Pieces should not be continually displayed in bright sunlight. Fading can be retouched if it is noticeable.


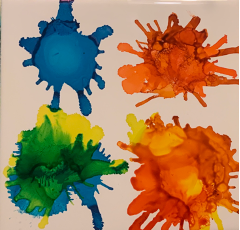


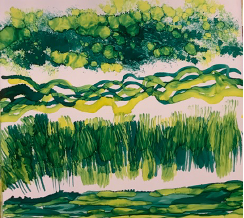

Working with alcohol inks involves a lot of experimentation as there are many ways to apply and manipulate the inks. There are different approaches to getting the ink onto your chosen surface. The bottled ink can be simply dropped out of the bottle. It will spread, run or even just sit there, depending on the surface. Ceramic tile and metal usually cause to the ink to spread out more. Another way to apply the bottled ink is to drag the ink from the tip of the bottle across the surface from one side to another. Overlapping inks will cause colors to run and blend together. This technique demonstrates the unpredictability inherent in this medium, because the inks don’t move in the same way every time. But, applying the ink from a palette with a brush will allow you to have more control. Different brushes can be used to create textures, on wet or dry ink. A fan brush is useful for grass like streaks. Tapping alcohol lightly onto dried ink can create unusual effects as well. Dropping ink onto a surface and using a straw or compressed air to blow across the ink before it dries, can create runs, or shapes that look like flower petals. Another way to alter the ink is to use a small spray bottle filled with alcohol. Spraying lightly across the surface of dry ink will create texture similar to adding salt to watercolor. Even a soft paper towel dampened with a bit of alcohol can be used to lift areas of color or to add color if the ink is applied to the paper towel. It really is not easy to describe how these techniques can work with the inks, you have to see it as it happens. I have included a few examples of my finished work to give you an idea of some of the possibilities with alcohol inks. There are many tutorials available on U Tube that could be helpful to watch. But the best way to learn to create alcohol ink art is to try it yourself. If the information in this blog convinces you to try this medium, you may be on your way to “losing control and liking it”!


Comments